
Picture yourself standing in your backyard as golden sunlight filters through the trees, watching wisps of aromatic smoke curl up from your grill. The anticipation builds as your guests gather around, drawn by the mouthwatering scent of perfectly seasoned barbecue beef back ribs slowly transforming into tender, flavorful perfection. This moment—when anticipation meets culinary artistry—defines what summer cookouts should truly embody.
Creating exceptional barbecue beef back ribs isn’t merely about following instructions; it’s about mastering techniques that transform ordinary gatherings into cherished memories. Whether you’re grilling for the first time or seeking to elevate your existing skills, this comprehensive guide will equip you with everything needed to become your neighborhood’s barbecue champion.
Table of Contents

Understanding Beef Back Ribs – Your Foundation for Success
What Makes Beef Back Ribs Special
Beef back ribs come from the upper portion of the cow’s rib section, specifically the area where prime rib roasts originate. These ribs offer substantial meat content with rich marbling that creates incredible flavor when cooked properly. Unlike their pork counterparts, beef back ribs require longer cooking times but reward patience with deeper, more robust flavors.
When selecting your ribs, look for cuts with good meat coverage across the bones. Quality beef back ribs should display bright red coloring with white marbling throughout the meat. Avoid ribs with excessive fat caps or those appearing dull or grayish—freshness matters significantly in your final results.
Essential Ingredients for Championship Results
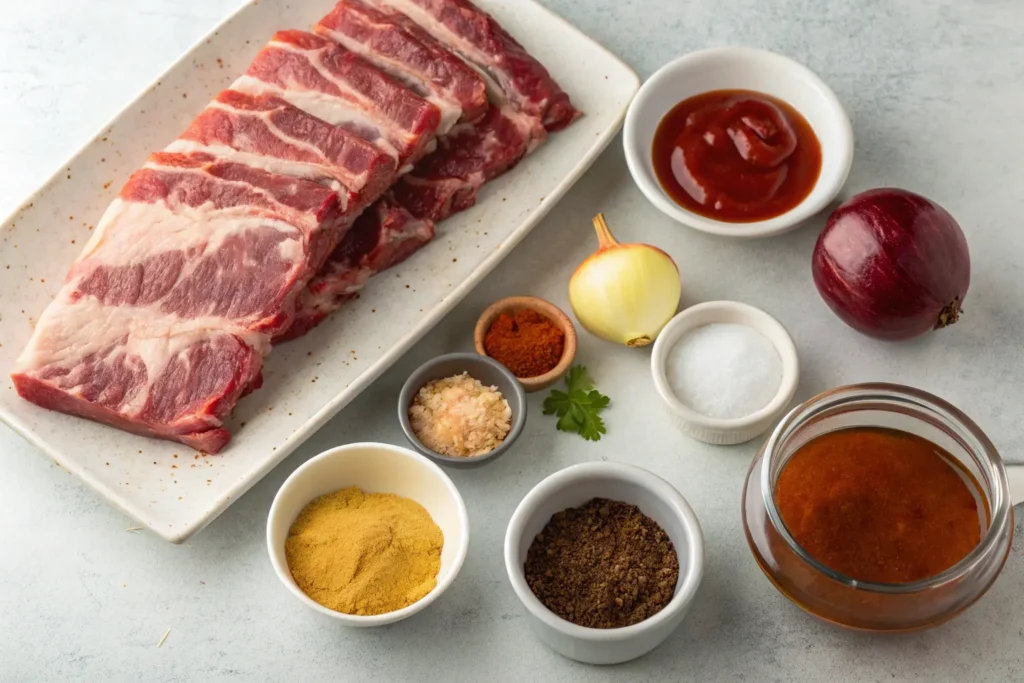
Success begins with gathering the right components. Here’s your complete ingredient lineup:
| Category | Ingredient | Quantity | Purpose |
|---|---|---|---|
| Main | Beef Back Ribs | 3-4 lbs | Primary protein base |
| Dry Rub | Brown Sugar | 1/4 cup | Caramelization foundation |
| Dry Rub | Paprika | 2 tablespoons | Color and smoky depth |
| Dry Rub | Garlic Powder | 1 tablespoon | Aromatic enhancement |
| Dry Rub | Onion Powder | 1 tablespoon | Savory base notes |
| Dry Rub | Black Pepper | 2 teaspoons | Heat and complexity |
| Dry Rub | Coarse Salt | 2 teaspoons | Flavor amplification |
| Dry Rub | Ground Cumin | 1 teaspoon | Earthy warmth |
| BBQ Sauce | Ketchup | 1 cup | Sauce foundation |
| BBQ Sauce | Apple Cider Vinegar | 1/4 cup | Tangy balance |
| BBQ Sauce | Worcestershire Sauce | 2 tablespoons | Umami depth |
Step-by-Step Barbecue Beef Back Ribs Recipe
Preparation Phase: Setting Yourself Up for Success
Begin your barbecue journey the evening before cooking. Remove your beef back ribs from packaging and inspect each rack carefully. Using a sharp knife, trim excess fat, leaving approximately 1/4 inch for flavor and moisture retention.
The membrane removal step proves crucial for tender results. Locate the thin, silvery membrane covering the bone side of your ribs. Using a butter knife, work underneath one corner to create a starting point. Grip the membrane with a paper towel for better traction, then pull steadily to remove it completely.
Creating Your Signature Dry Rub
Combine all dry rub ingredients in a mixing bowl, whisking thoroughly to ensure even distribution. The brown sugar provides caramelization while paprika contributes both color and subtle smokiness. Garlic and onion powders create aromatic depth, while cumin adds earthy undertones that complement beef beautifully.
Apply your rub generously, massaging it into every surface of the meat. Don’t forget the ends and between bones—comprehensive coverage ensures consistent flavor throughout. Wrap seasoned ribs in plastic wrap and refrigerate overnight, allowing flavors to penetrate deeply.
The Smoking Process: Low and Slow Perfection
Equipment Setup and Temperature Control
Preheat your smoker to 225°F, maintaining steady temperature throughout cooking. If using a charcoal smoker, arrange coals to one side for indirect heat. Gas grill users should light only one side, creating a similar indirect cooking zone.
Select wood chips based on desired flavor intensity. Hickory provides robust smokiness, while apple offers milder, sweeter notes. Oak delivers consistent, well-balanced smoke that won’t overpower your beef’s natural flavors.
The 3-2-1 Method Adapted for Beef Back Ribs
Phase One: Initial Smoke (3 Hours) Place seasoned ribs bone-side down on your smoker grates, positioned away from direct heat. Maintain 225°F while adding wood chips every 45 minutes for consistent smoke production. During this phase, your ribs develop their foundational bark—that coveted crusty exterior barbecue enthusiasts prize.
Phase Two: Wrapped Cooking (2 Hours) After three hours, wrap each rack individually in heavy-duty aluminum foil. Add two tablespoons of butter and a splash of apple juice before sealing completely. This steaming process accelerates cooking while ensuring moisture retention. Your ribs will become notably more tender during this wrapped phase.
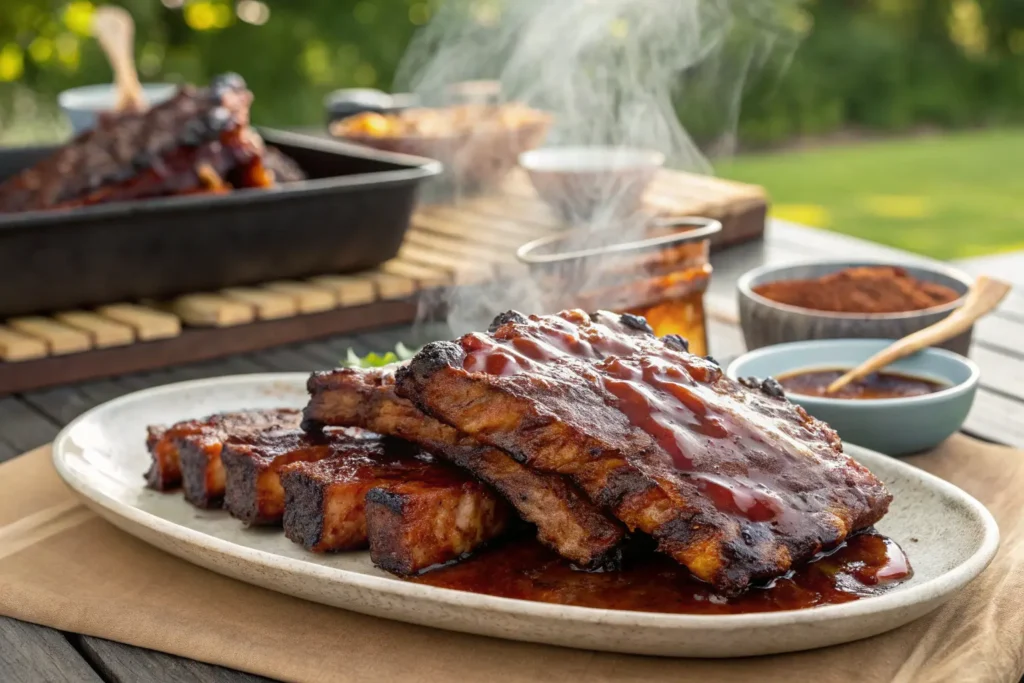
Phase Three: Final Glazing (1 Hour) Unwrap your ribs and return them to the smoker. Apply your homemade barbecue sauce using a basting brush, creating an even coating. Continue cooking until internal temperature reaches 195°F to 203°F—the optimal range for fork-tender results.
Alternative Cooking Methods
Oven-Finished Technique
Weather doesn’t always cooperate with outdoor cooking plans. Begin by searing seasoned ribs in a hot skillet to develop initial browning. Transfer to a 275°F oven, following similar timing guidelines. Add liquid smoke to your braising liquid for authentic barbecue flavor.
Gas Grill Adaptation
Create indirect heat zones by lighting only half your burners. Place ribs on the unlit side, maintaining temperatures between 225°F and 250°F. Use a smoker box filled with soaked wood chips for authentic smoke flavor.
Pro Tips for Barbecue Excellence
Temperature Mastery and Doneness Tests
Invest in a reliable digital thermometer—guesswork leads to disappointing results. Beyond internal temperature readings, learn these professional doneness indicators:
- The Bend Test: Lift ribs with tongs at the center. Properly cooked ribs will crack slightly on the surface
- Toothpick Test: A toothpick should slide easily between bones with minimal resistance
- Visual Cues: Meat pulls back from bone ends approximately 1/4 to 1/2 inch
Troubleshooting Common Challenges
Tough Results: Usually indicates insufficient cooking time. Beef back ribs require patience—rushing leads to chewy disappointment.
Dry Texture: Often caused by excessive heat or inadequate moisture retention. Lower temperatures and proper wrapping prevent this issue.
Uneven Cooking: Rotate racks every hour and position thicker portions toward heat sources for consistent results.
Serving Your Barbecue Masterpiece
Perfect Pairings for Summer Cookouts
Complement your barbecue beef back ribs with these classic accompaniments:
- Creamy coleslaw provides cooling contrast to rich, smoky flavors
- Baked beans enhanced with barbecue sauce create flavor harmony
- Grilled corn brushed with herb butter adds sweetness and texture
- Tangy potato salad balances the meal’s richness
- Fresh watermelon offers refreshing palate cleansing
Presentation That Impresses
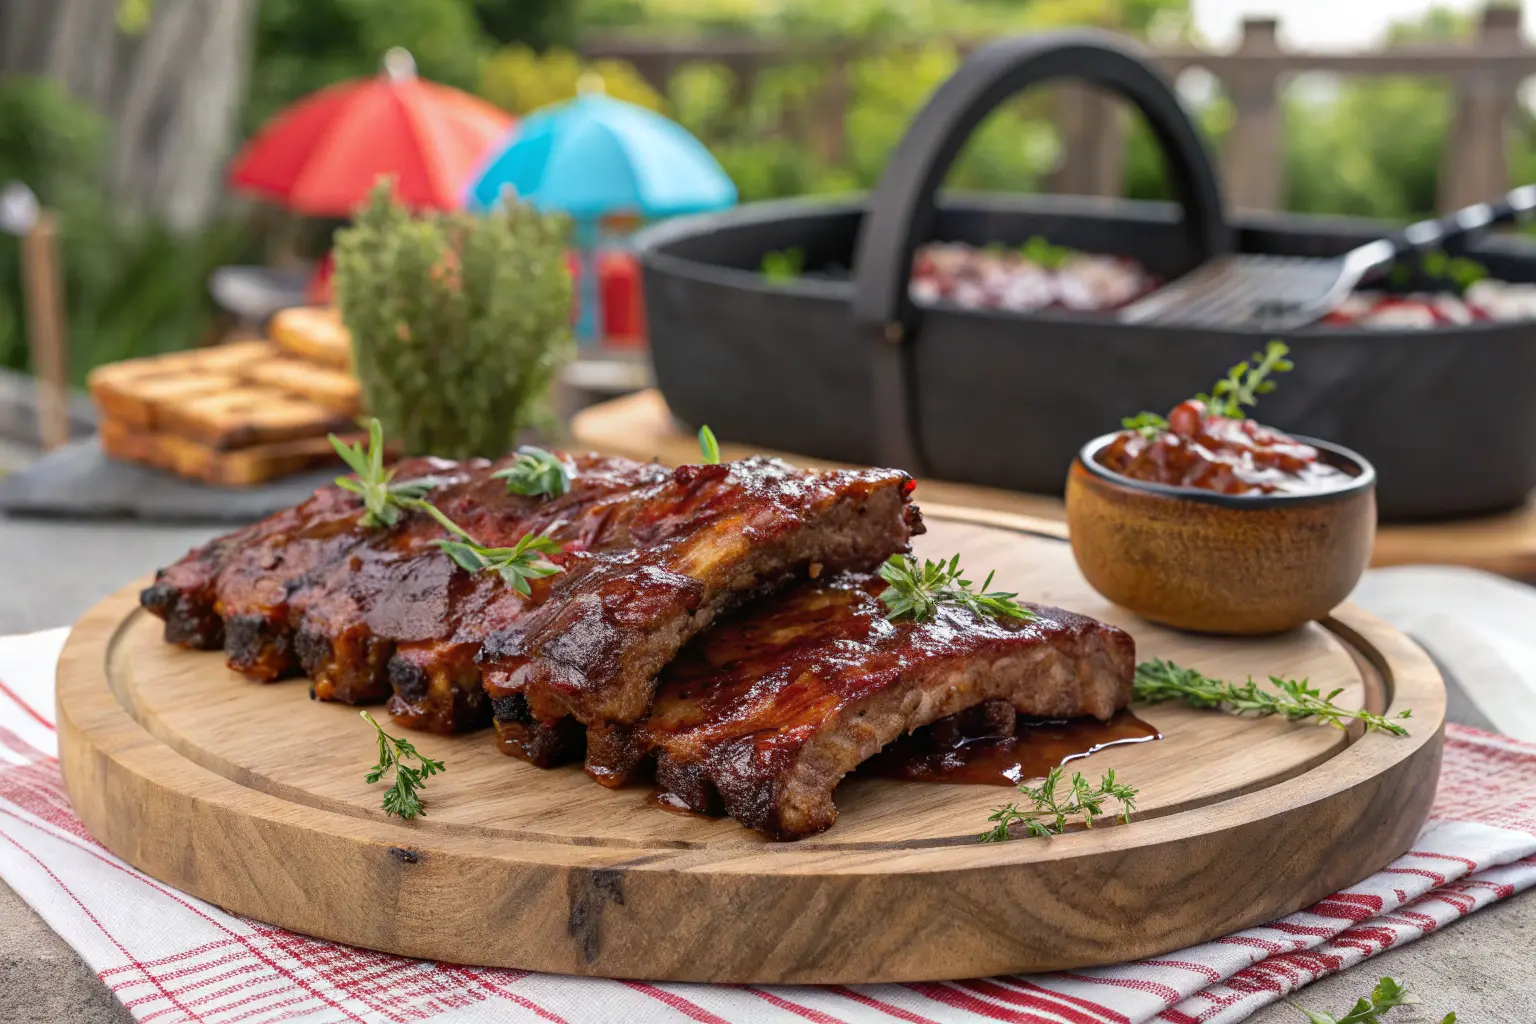
Arrange finished ribs on a large wooden cutting board, allowing natural juices to collect in grooves. Provide sharp knives for easy separation between bones. Warm barbecue sauce served in small bowls lets guests customize their experience.
Storage and Reheating Excellence
Properly stored barbecue beef back ribs maintain quality for three to four days refrigerated. Wrap cooled ribs tightly in aluminum foil, then place in airtight containers. For longer storage, vacuum-sealed ribs freeze successfully for up to three months.
Reheating requires gentle approaches to preserve texture. Place wrapped ribs in a 250°F oven for 20-30 minutes, or steam lightly to restore moisture before serving.
Frequently Asked Questions
How long should I cook barbecue beef back ribs? Plan for approximately 6 hours total using the 3-2-1 method at 225°F. Cooking times vary based on rib thickness and desired tenderness levels.
Can I make great barbecue beef back ribs without a smoker? Absolutely! Oven finishing and gas grill techniques produce excellent results when executed properly with attention to temperature control.
What’s the best wood for smoking barbecue beef back ribs? Hickory provides classic barbecue flavor, while oak offers balanced smokiness. Apple wood contributes subtle sweetness that complements beef beautifully.
Your Path to Barbecue Mastery Begins Now
Mastering barbecue beef back ribs transforms you into more than just a backyard cook—you become a creator of experiences that bring people together around shared meals and lasting memories. The techniques outlined here provide your foundation, but true expertise develops through practice and experimentation.
Start planning your next cookout today. Gather your ingredients, prepare your equipment, and embrace the slow-cooking process that transforms simple beef ribs into extraordinary culinary achievements. Your guests are waiting to experience the incredible flavors you’re about to create.
Ready to become your neighborhood’s barbecue legend? Fire up that smoker this weekend and put these techniques into action. Share your results and tag us in your barbecue success stories—we can’t wait to see your perfectly smoked beef back ribs in action!